Photoshop Scripting for Beginners: ExtendScript and UXP Scripting
Photoshop scripting lets you automate tasks that would otherwise take dozens of menu clicks or manual steps. If you want to batch-resize images, rename layers, or apply a sequence of edits across many documents, scripting is the way to do it. The tricky part is that Photoshop offers two main scripting options: ExtendScript (the older, .jsx-based approach) and UXP Scripting (the newer, modern JavaScript option). For beginners, understanding both helps you choose the right one and avoid confusion when searching for tutorials or scripts online.
What Is ExtendScript?
ExtendScript is a JavaScript dialect Adobe introduced years ago for automating Creative Cloud apps, including Photoshop. ExtendScript files use the .jsx extension and are based on ECMAScript 3 (ES3), an older JavaScript standard from 1999. That means no let, const, arrow functions, or promises. You work with var, function, and callback-style code.
ExtendScript runs in its own host context inside Photoshop. Scripts talk to Photoshop through a well-documented object model: app, document, layer, and so on. Countless tutorials, scripts, and actions rely on ExtendScript, so it is still the most widely used option for simple automation. You will find hundreds of .jsx scripts online for tasks like creating layer comps, exporting assets, or running a series of filters.
What Is UXP Scripting?
UXP Scripting is Adobe’s newer scripting runtime for Photoshop. UXP scripts use the .psjs extension and run on a modern JavaScript engine (V8), which supports ES6 and above. That means let, const, async/await, and other modern syntax work out of the box.
UXP scripts communicate with Photoshop through the UXP and Photoshop APIs. Many operations use batchPlay, Adobe’s descriptor-based API for invoking actions and commands. UXP Scripting is documented in Adobe’s UXP Scripting overview, where Adobe positions it as a simpler alternative to building a full UXP plugin. A script runs, does its job, and unloads. You can also debug .psjs scripts with the UXP Developer Tool (UDT 1.6+): with Photoshop running, open UDT, click Debug Script in the Connected Applications card, select your script file, and you get breakpoints, step-through, and variable inspection. If you later want to build full UXP plugins (with UI, packaging, and distribution), the same tool lets you create, load, debug, and package UXP-based plugins.
ExtendScript vs UXP Scripting: When to Use Which
For beginners, the practical choice often comes down to what you need and what already exists:
- ExtendScript suits existing
.jsxscripts, simple one-off tasks, and workflows where you or others have already written working code. Many actions and shared scripts still ship as ExtendScript. - UXP Scripting suits new projects where you want modern JavaScript, or when you need APIs that Adobe has exposed only in the UXP layer. If you are starting from scratch and comfortable with modern JS, UXP is often the better long-term option.
Adobe has not deprecated ExtendScript for scripting, but new features and APIs tend to appear in UXP first. You can use both in the same workflow: run an older .jsx script for compatibility, and a newer .psjs script for a different task.
Where to Write and Run Scripts
Photoshop does not ship with a built-in script editor. You can run scripts via File > Scripts > Browse (for .jsx files) or by assigning them to actions, but writing and editing code usually means using an external editor and then loading the file back into Photoshop. That loop can slow down learning.
Plugins like Configurator Reloaded 2 include a built-in Script Editor that lets you create, edit, and run both ExtendScript and UXP scripts in one place. You can switch between ExtendScript and UXP mode, write a few lines, hit run, and see the result in Photoshop without leaving the plugin.
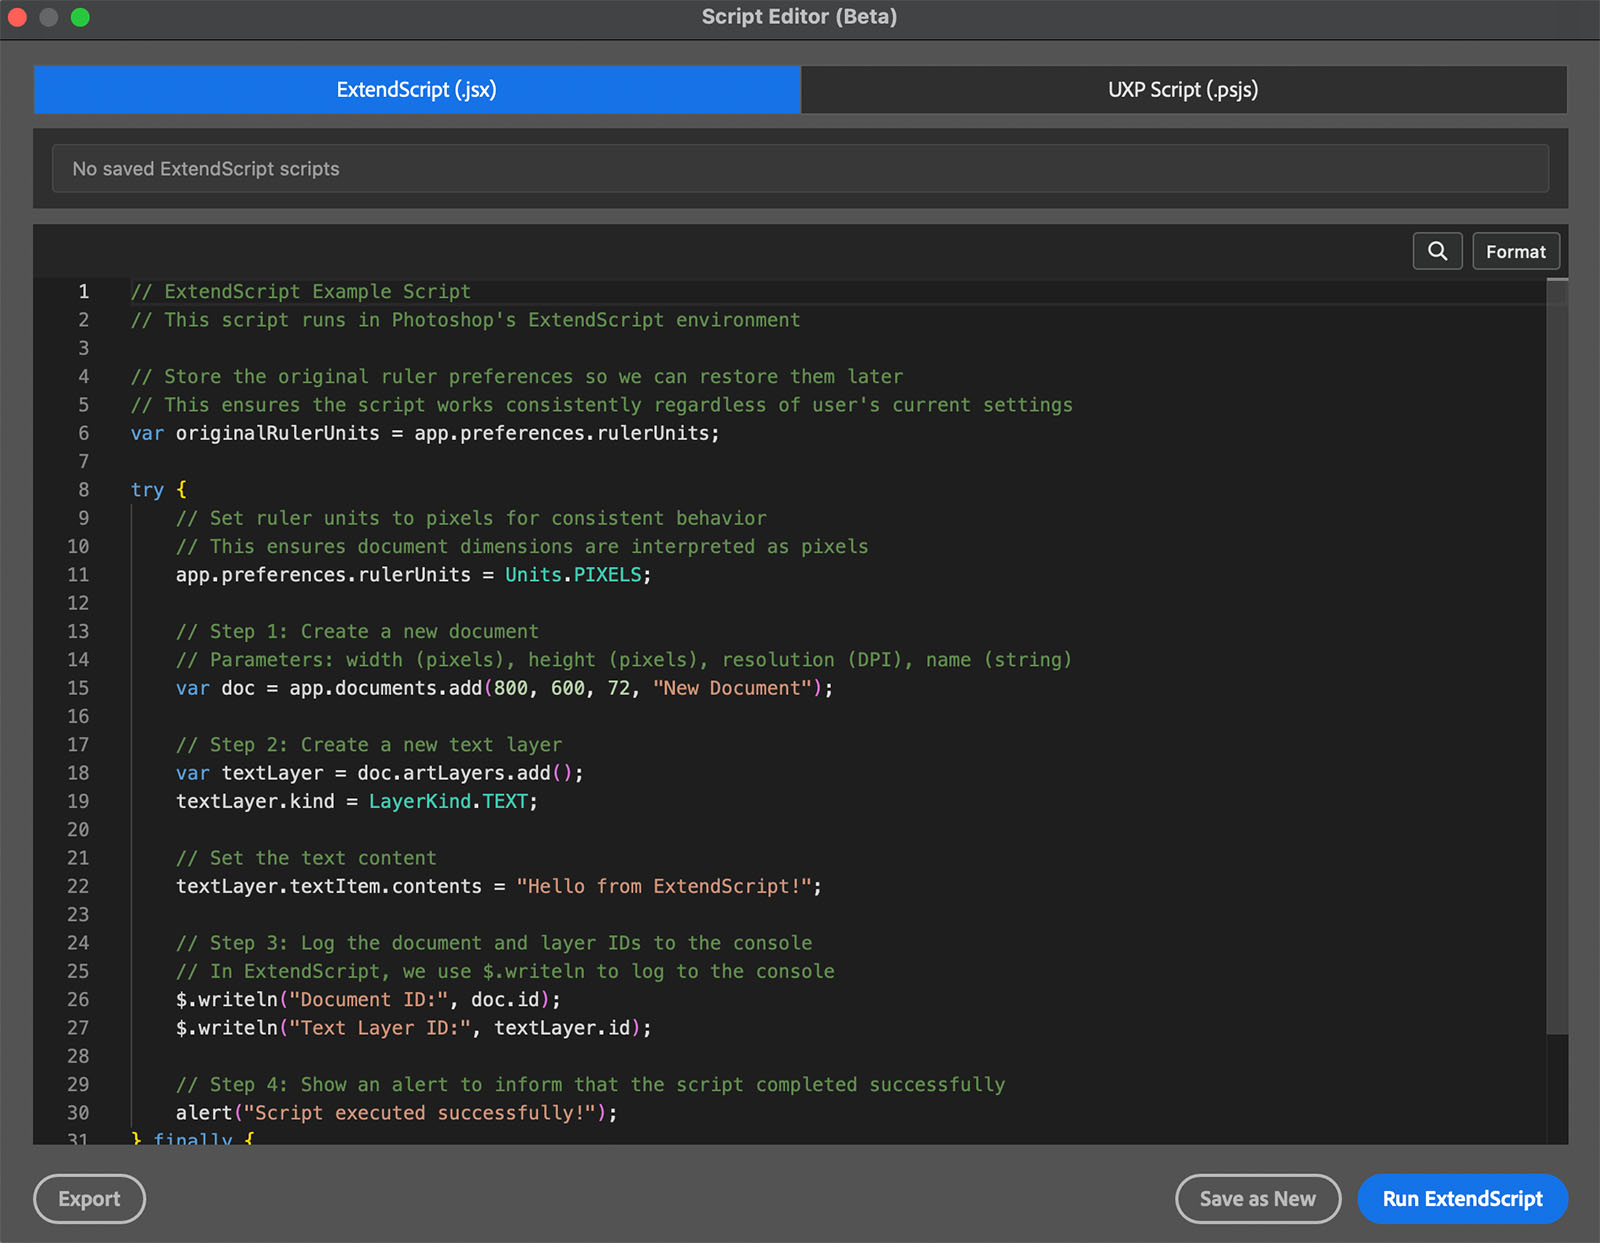
The Script Editor in Configurator Reloaded 2 lets you write and run ExtendScript and UXP scripts directly in Photoshop, with autocomplete and API hints.
That makes it easier to experiment: tweak a script, run it, and iterate. You can save script presets and add them as buttons to custom panels, alongside workflow scripts for frequency separation, dodge and burn, and more. If you already use custom panels for tools and actions, adding your own scripts fits naturally into the same workspace.
Script Editor vs UXP Developer Tool: How They Differ
Both options let you work with Photoshop scripts, but they target different workflows:
UXP Developer Tool (Adobe’s official app, installable from Creative Cloud): Best when you need full debugging for UXP scripts. You edit your .psjs file in an external editor, then use UDT’s Debug Script button to attach a debugger with breakpoints, step-through execution, and variable inspection. UDT does not support ExtendScript, only UXP. It is a separate app you run alongside Photoshop. The same tool is used for building and debugging full UXP plugins (with HTML/CSS UI), so if you plan to graduate from scripts to plugins, UDT is the standard path.
Script Editor (built into Configurator Reloaded 2): Best when you want edit and run in one place without leaving Photoshop. It supports both ExtendScript and UXP in a single interface, with autocomplete, API hints, and a basic console for console.log (UXP) or $.writeln (ExtendScript). There are no breakpoints or step-through; you log values and re-run. The Script Editor shines for quick iteration and learning: write a few lines, run, check the result, tweak, and repeat. Script presets can be saved and added as panel buttons next to your tools and workflow scripts.
In practice: use the Script Editor for day-to-day scripting and rapid experiments. If a UXP script misbehaves and you need to trace execution line by line, switch to the UXP Developer Tool and its debugger.
Getting Started: Your First Script
A minimal ExtendScript example that creates a new document might look like this:
var doc = app.documents.add(800, 600, 72, "My Document");
The same idea in UXP Scripting uses different APIs. Adobe’s UXP docs show how to call require and use the Photoshop module. Start with small examples: create a document, add a layer, change a property. Once that works, you can build toward more complex automations.
Conclusion
Photoshop scripting for beginners boils down to two main options: ExtendScript for .jsx files and legacy compatibility, and UXP Scripting for modern JavaScript and .psjs files. Both let you automate repetitive tasks. Choosing one depends on your goals and the scripts you want to run or learn from.
If you want to try scripting without setting up an external editor, Configurator Reloaded 2 includes a Script Editor that supports both ExtendScript and UXP. You can try it free.