Workflow Scripts in CR 2
New in v2.1.4Streamline your workflow with helpful scripts that automate repetitive tasks, organize your workspace, and simplify both simple and complex Photoshop techniques.
What are Workflow Scripts?
Workflow Scripts are helpful automation tools built directly into the Configurator Reloaded 2 plugin that make your work easier and more efficient. Whether it's a simple utility task, organizing your workspace, or setting up complex techniques like frequency separation, these scripts eliminate the need to manually perform repetitive steps and remember complicated procedures that are common in professional creative workflows.
More scripts will be added with future updates
Have an idea for a workflow script? I'd love to hear from you!
Suggest a Workflow ScriptHow to Use Workflow Scripts
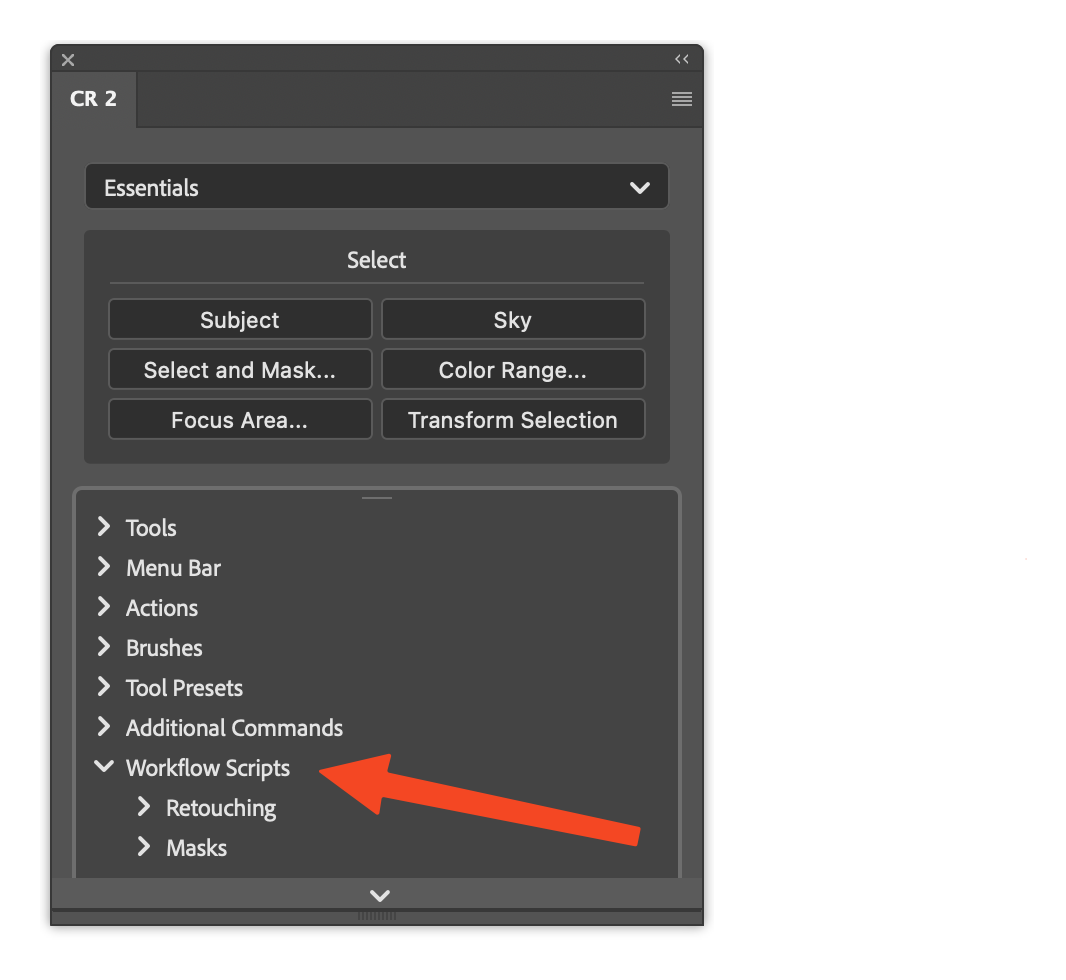
- Find the script you want to use in the "Workflow Scripts" section in the SlideIn
- Add the script to your desired container by Drag & Drop
- Click the script button and let it perform its automated task
Available Script Categories and Scripts
Retouching Scripts
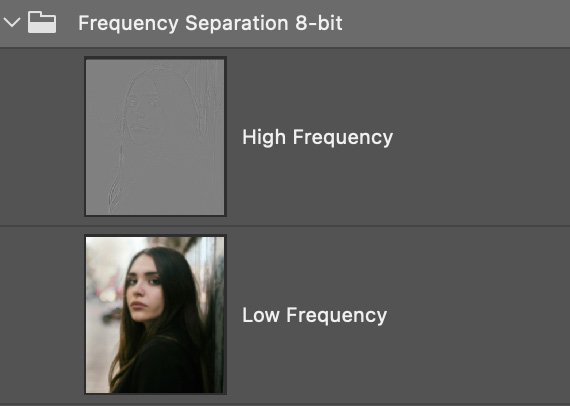
Frequency Separation 8-bit
Watch Tutorial from PiXImperfectThis script automatically sets up frequency separation layers for detailed retouching work in 8-bit mode. Frequency separation is a powerful technique that separates texture from color and tone, allowing you to retouch skin imperfections while preserving natural skin texture.
What it creates: High frequency layer (texture) and Low frequency layer (color/tone).
Frequency Separation 16-bit
Watch Tutorial from PiXImperfectSimilar to the 8-bit version, this script creates frequency separation layers optimized for 16-bit workflows. This version provides better tonal range and color depth, making it ideal for high-end retouching work where maximum image quality is required.
What it creates: High frequency layer (texture) and Low frequency layer (color/tone), optimized for 16-bit color depth with enhanced tonal range.
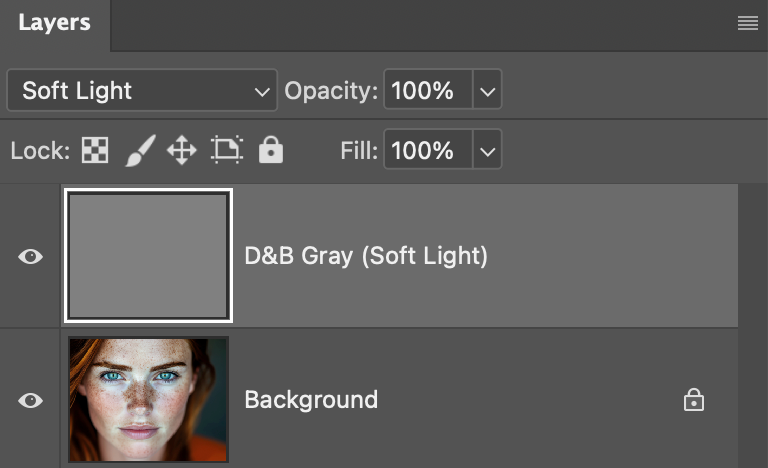
D&B Gray (Soft Light)
Watch Tutorial from PiXImperfectCreates a neutral gray layer set to Soft Light blend mode that is ready for non-destructive dodge and burn work using brushes. This is ideal for subtle retouching and shaping light.
What it does: Adds a 50% gray layer above your current layer, switches it to Soft Light, and prepares it for targeted dodge and burn painting.
D&B Gray (Overlay)
Watch Tutorial from PiXImperfectSimilar to the Soft Light version, but uses Overlay blend mode for a stronger contrast effect when dodging and burning.
What it does: Adds a 50% gray layer above your current layer, switches it to Overlay, and prepares it for more pronounced dodge and burn adjustments.

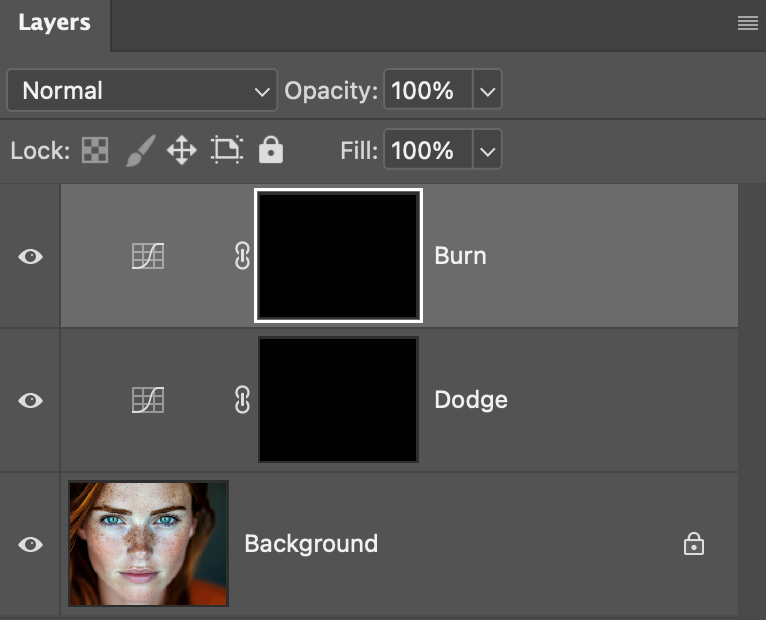
Automatically creates two curve adjustment layers named "Burn" and "Dodge", each with inverted masks so you can paint in light and shadow precisely where you need them.
What it does: Adds paired Curves layers for darkening and brightening, sets up their masks, and prepares them for painting with white on the masks to dodge and burn.
Masks Scripts
Luminosity Masks
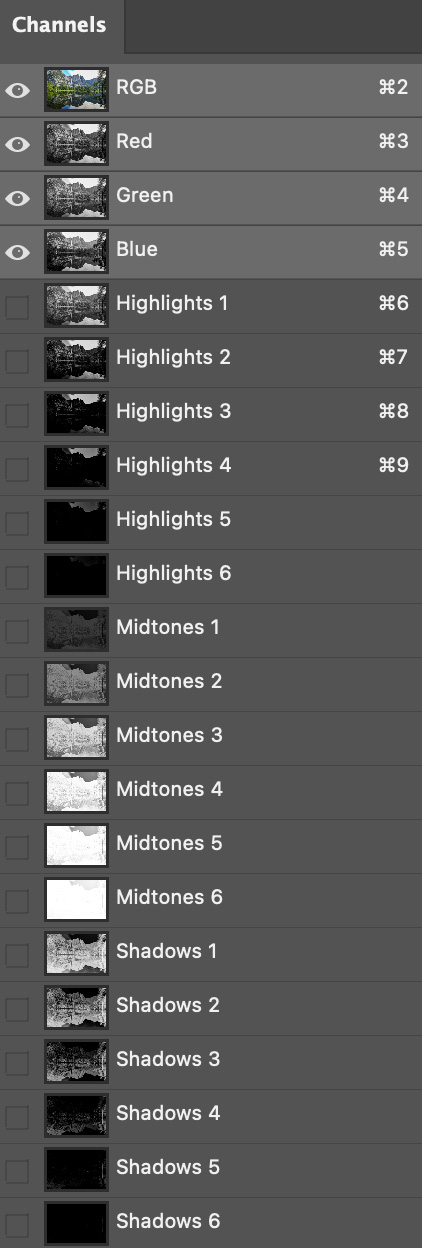
Watch Tutorial from photoshopCAFEThis script generates a comprehensive set of luminosity masks based on the brightness values in your image. These masks allow you to make precise selections and adjustments to specific tonal ranges (highlights, midtones, shadows) without affecting other areas of your image.
What it creates: Multiple luminosity mask channels for highlights, midtones, and shadows.
Note: The masks will be created as channels in the channels panel. Hold Cmd/Ctrl and click on a channel to load it as a selection.
Delete Luminosity Masks
This utility script deletes all luminosity masks created by the Luminosity Masks script from your document's channels panel, helping you clean up your workspace when you're done with luminosity-based adjustments.
What it does: Safely deletes all luminosity mask channels.
Layers Scripts
New Layer from Layers Below
Creates a new layer that is a merged copy of all visible layers below the current one. This is a quick, non-destructive way to consolidate the current look of your document into a single editable layer while keeping all original layers intact.
What it does: Adds a stamped-visible layer above selected/active layer without flattening your document.
Unlike Photoshop's built-in 'Merge Visible to New Layer', which merges all visible layers, this script merges only the currently selected layer with the visible layers below it (and ignores any layers above).
Unlock all Layers
Quickly unlocks all layers in your document, including the background layer, so you can move, edit, or reorganize without interruption.
What it does: Removes the lock from all layers, enabling full editing.
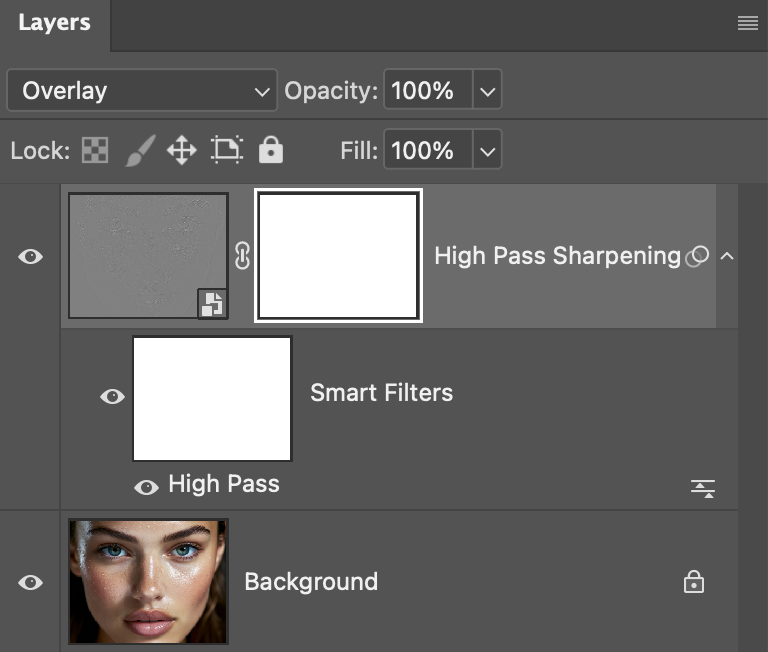
High Pass Sharpening
Watch Tutorial from PHLEARNCreates a non-destructive sharpening layer using the High Pass technique. The script merges visible layers (or layers below the selected one), desaturates, applies High Pass, and sets the layer to Overlay blend mode with a reveal-all mask. You can define the high-pass radius yourself—a dialog appears to let you adjust it.
What it does: Adds a High Pass sharpening layer in Overlay mode above your current layer, with a mask ready for targeted sharpening.