High Pass Sharpening Without Crunchy Edges
If your image still looks soft after retouching, or your sharpening makes skin look harsh, high pass sharpening gives you a cleaner fix. It moves the effect onto its own layer so you can control strength, mask it where needed, and keep the base image untouched.

A detail-heavy portrait like this is a good match when you want to set up High Pass sharpening fast and keep the effect editable.
Photo by Joshua Rawson-Harris on Unsplash.
Why High Pass Sharpening Looks Cleaner
High pass sharpening works by isolating edge detail and blending it back into the image with contrast-heavy blend modes such as Overlay or Soft Light. Smooth areas stay mostly neutral gray, while edges get the extra contrast that our eyes read as sharpness.
That is why the technique is useful for portraits, product shots, and final output sharpening. You can lower the layer opacity, change the blend mode, or paint on a mask if the result feels too strong.
How to Set It Up Manually in Photoshop
You can build high pass sharpening by hand in a few predictable steps:
- Create a merged copy of the layers you want to sharpen.
- Desaturate that merged layer so color does not create strange halos.
- Go to
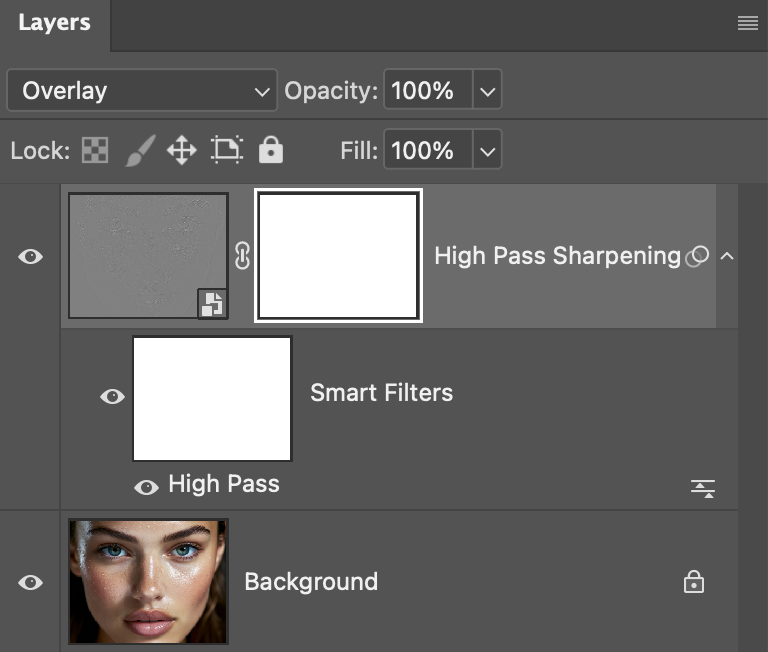
Filter > Other > High Passand start with a low radius. - Change the layer blend mode to
Overlayfor a stronger effect orSoft Lightfor a gentler one. - Add a white layer mask so you can paint the sharpening out of skin, background, or other soft areas.
For portraits, a radius around 1 to 3 pixels is often enough. Larger radii can work for broader edges, but they also make it easier to create a crunchy look.
How to Avoid Halos and Oversharpening
The most common mistake is judging the effect while zoomed too far out. Check your image at 100% so you can see whether eyelashes look crisp or whether skin pores and edges are starting to break apart.
Masking matters just as much as radius. Sharpen eyes, brows, lashes, hair, clothing detail, or texture that should feel crisp. Back off on cheeks, forehead, bokeh, and flat backgrounds where sharpening tends to add noise instead of clarity.
It also helps to keep high pass sharpening near the end of your workflow. Finish cleanup, color work, and dodge and burn first, then sharpen the version you actually plan to export.
Speed Up the Setup With a Workflow Script
If you use this technique often, Configurator Reloaded 2 can remove the boring setup work. Its built-in High Pass Sharpening script creates the merged layer, desaturates it, applies the filter with your chosen radius, and adds a mask so you can sharpen selectively right away.
The High Pass Sharpening workflow script in the plugin builds the layer, blend mode, and mask for you, so you can start refining the result instead of rebuilding the setup each time.
High pass sharpening is most useful when it stays subtle and targeted. If you want a repeatable way to sharpen the right details without rebuilding the layer stack by hand, try Configurator Reloaded 2 and add the script to your panel for one-click access.