Portrait Retouching Workflow in Photoshop: A Practical Order of Steps
A clear portrait retouching workflow in Photoshop saves time and keeps results consistent. The order of steps matters: fix global issues first, then tackle local retouching, and save sharpening for last. Doing it the other way around can lead to redoing work or undoing edits.
This guide walks through a practical sequence that many retouchers use. It assumes you are working on a portrait that has already been selected, cropped, and is ready for retouching.

A portrait like this benefits from a clear retouching order.
Photo by Pablo Merchán Montes on Unsplash.
1. Global Adjustments First
Before touching skin or local details, fix exposure, white balance, and overall color. Use a Curves or Levels adjustment layer, or Camera Raw if your file came from a Raw processor. The goal is to get the image to a solid baseline so later retouching happens on correct tones and colors.
If you fix blemishes or do frequency separation on a too-dark or color-shifted image, you will end up redoing that work when you finally correct the global look. Do it once, at the start.
2. Blemish Removal and Cleanup
Next, remove distracting elements: pimples, stray hairs, dust spots, and small imperfections. Use the Healing Brush, Spot Healing Brush, or Clone Stamp. Work on a duplicate layer or a new layer so you can mask or lower opacity if needed.
This step happens before frequency separation because blemishes often affect both texture and color. Cleaning them first gives you a cleaner base for the split. If you use frequency separation later, you can still do minor cleanup on the low-frequency layer for color patches and on the high-frequency layer for texture.
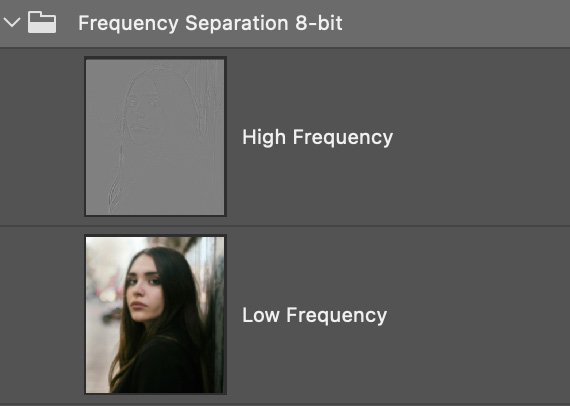
3. Frequency Separation for Skin
Frequency separation splits an image into a high-frequency layer (texture) and a low-frequency layer (color and tone). On the low layer, you smooth skin tone and fix color patches without affecting pores or fine detail. On the high layer, you can soften harsh texture if needed.
Set up the layers manually or use a script. Many retouchers prefer to do frequency separation after basic cleanup so the split layers reflect a cleaner image. Work on the low layer first for color and tone, then touch the high layer sparingly for texture.
Plugins like Configurator Reloaded 2 include built-in Frequency Separation scripts that create the correct layer structure with one click. Add them to a custom panel to speed up this step.
The plugin creates frequency separation layers automatically so you can focus on retouching instead of setup.
4. Dodge and Burn for Shape and Depth
Once skin tone and texture look good, add dimension with dodge and burn. Use a gray layer (Soft Light or Overlay) or a Curves-based setup. Paint with white to lighten and black to darken, focusing on cheekbones, jawlines, eyes, and hair. Keep flow low (around 5–15%) and build up gradually.
Dodge and burn belongs after frequency separation because you are shaping light on a corrected base. Doing it before can make the effect look inconsistent once you fix color and tone. The plugin offers D&B Gray and D&B Curves scripts for one-click setup.
5. Sharpening Last
Save sharpening for the end of the workflow. Whether you use High Pass, Unsharp Mask, or Smart Sharpen, you want to sharpen the final result, not an intermediate version. Use a mask to restrict sharpening to eyes, hair, and clothing, and avoid or reduce it on smooth skin.
If you use high pass sharpening, create the layer after all retouching is done. The plugin includes a High Pass Sharpening script that adds the layer with Overlay blend mode and a mask in one click.
Why the Order Matters
Global adjustments first prevent wasted effort on images that still need exposure or color fixes. Blemish removal before frequency separation keeps the split layers clean. Dodge and burn after frequency separation shapes light on corrected skin. Sharpening last ensures you enhance the final image, not a half-finished version.
You can adapt this order for your style. Some retouchers do light dodge and burn before frequency separation. Others combine steps or skip frequency separation for simpler portraits. The core idea stays the same: global before local, structure before detail, and sharpening at the end.
Conclusion
A practical portrait retouching workflow in Photoshop follows a clear order: global adjustments, blemish removal, frequency separation, dodge and burn, and sharpening. Sticking to this sequence helps you work faster and avoid redoing edits.
If you want one-click setup for frequency separation, dodge and burn, or high pass sharpening, Configurator Reloaded 2 includes built-in workflow scripts. Create a container, drag and drop the commands you need into it, and build a step-by-step list tailored to your workflow. Trigger each step with a single click. You can try it free.