Add Layer Masks in Photoshop Without Menu Hunting
You already know you need a layer mask. The stall is not the concept, it is locating Add Layer Mask, Invert, and Disable across the Layer menu, the Layers panel footer, and shortcuts you only half remember. Put those commands in one place, in the order you add and paint, so the next file does not send you back into Layer > Layer Mask.
Add a Layer Mask From the Menu or Layers Panel
Start with the layer that should stay editable. Then pick the mask type that matches the job, not the icon you happen to hit.
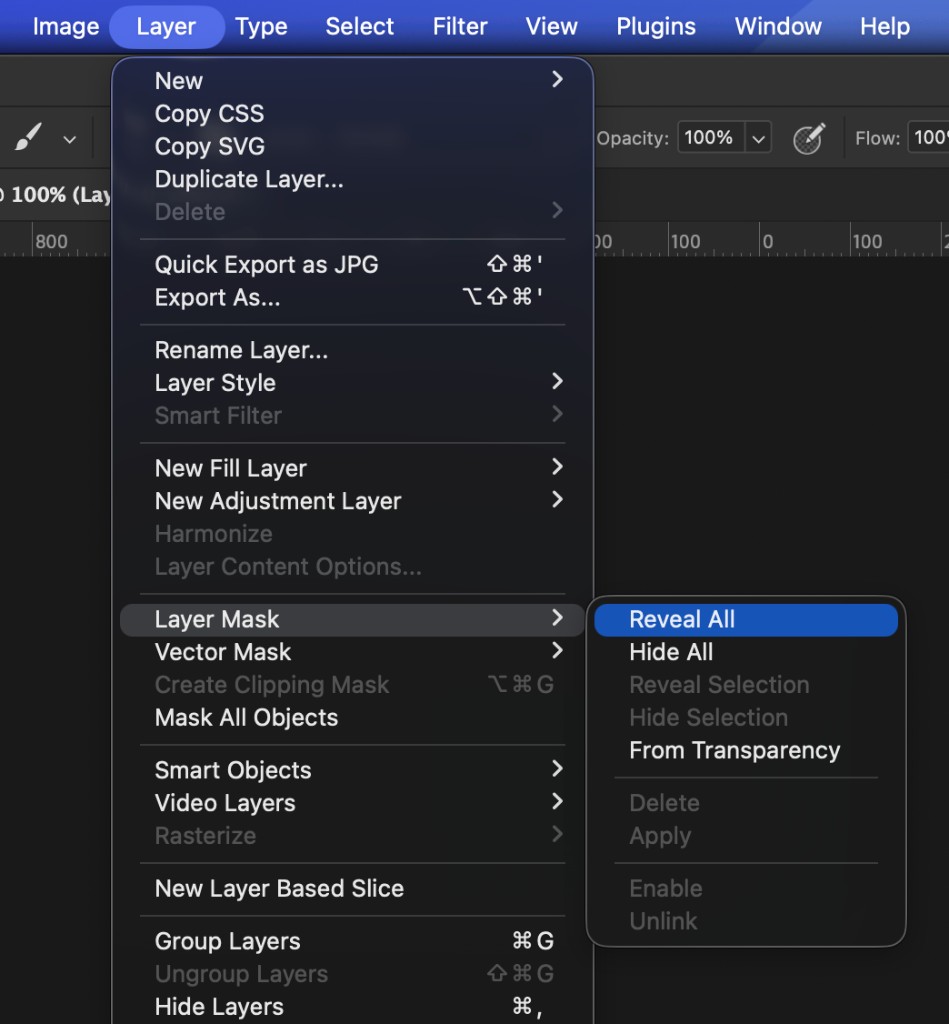
_Layer > Layer Mask > Reveal All in Photoshop.
Reveal All (white mask). The full layer stays visible. You paint black to hide. Use this when most of the layer should show and you only need to knock out a few areas.
- Select the layer.
- Choose Layer > Layer Mask > Reveal All.
- Or click the rectangle-with-circle icon at the bottom of the Layers panel. That button is Add layer mask, and it creates a white mask when nothing is selected.
Hide All (black mask). The layer starts invisible. You paint white to reveal. Use this when the effect or object should stay hidden until you paint it in.
- Select the layer.
- Choose Layer > Layer Mask > Hide All.
- Or hold Option (Mac) or Alt (Windows) and click the same Add layer mask icon.
From a selection. Build the selection first (lasso, Select Subject, Color Range), then add the mask while the marching ants are still active.
- Make the selection.
- Choose Layer > Layer Mask > Reveal Selection to keep what you selected, or Hide Selection to hide it.
- Clicking the Layers panel mask icon with an active selection also turns that selection into a white-on-black mask.
None of those paths is hard. The slowdown is that they live in three places: a nested Layer submenu, a tiny footer icon, and a modifier-click that is easy to forget when you are mid-edit.
Invert and Disable Without Painting on the Layer
A mask only works if Photoshop is targeting the mask, not the pixels. Click the mask thumbnail until you see a border around the mask, then run the next command.
Invert. Turns white to black and black to white. This is the usual fix when you added Reveal All and meant Hide All, or when an adjustment should start hidden so you can paint it onto eyes, a sky, or a product.
- Click the layer mask thumbnail.
- Press Cmd+I (Mac) or Ctrl+I (Windows).
- If you prefer menus, use Image > Adjustments > Invert only after the mask thumbnail is selected. Invert on the layer pixels will wreck the image.
Disable. Hides the mask so you can check the unmasked layer without deleting your paint.
- Shift-click the mask thumbnail. A red X means the mask is off.
- Shift-click again to turn it back on.
- Or use Layer > Layer Mask > Disable and Enable.
Do not confuse Delete with Apply. Layer > Layer Mask > Delete throws the mask away and restores full visibility. Apply bakes the mask into the pixels, which you cannot paint back. Delete is the safe undo. Apply is a commit.
If Density or Feather in the Properties panel looks missing, the mask is not selected. Click the mask thumbnail first, then adjust. Those sliders are useful, but they are another panel to hunt if your next step is simply invert-and-paint.
Keep Mask Commands in Your Real Edit Order
A pile of mask buttons is not a workflow yet. Order is what stops skipped steps, because the panel should read like the job from top to bottom.
For a composite or a local adjustment, a practical sequence looks like this:
- Tools and brushes you actually paint with
- The add-mask command you use most (Reveal All or Hide All)
- Invert, sitting next to Add, because you often need it on the same layer
- Disable, so you can A/B the mask without digging Shift-click
- The next edit after masking, such as Curves, a cleanup tool, or export
Put Invert beside Add Layer Mask, not in a miscellaneous group at the bottom. When the next click is visually the next step, you are less likely to invert the pixels by mistake or skip the mask and start brushing on the layer.
Plugins like Configurator Reloaded 2 let you drag those Layer menu items, the Brush tool, and the rest of the job into one panel arranged in that sequence. Rename the buttons to the words you already use, such as "mask reveal" and "invert mask", so the row reads as a checklist instead of Photoshop's submenu labels.
Drag Layer Mask commands into a panel in the plugin, then keep add, invert, and disable in your edit order.
Use Layer > Layer Mask when you are learning which variant you need. After that, run add, invert, and disable from the step in your process where they belong. If finding the same three commands is still the slow part of otherwise solid masking, put them in one ordered panel and try Configurator Reloaded so the next click is waiting instead of buried under Layer.